Wednesday, November 13, 2013

Homemade Ornaments

Christmas is approaching which only means it's time to whip out those boxes of decorations. One of the frustrations on doing so is finding out you don't have enough ornaments. Whether you bought a bigger tree or some of them went MIA, you are going to need some ornaments. Before you run out to buy some, consider making the ornaments and  save yourself some money. These will be good Christmas activities for the kids to get involved.
                    

   Bird Feeder Ornaments

        ½ cup water
        3 tbsp. Corn syrup
        1 envelope of Knox  
            unflavored Gelatin
        ¾ cup flour
        3 cups of birdseed
        cookie cutters
             yarn or twine


         On low heat, dissolve gelatin and corn syrup

          in water, until dissolved, do not boil. Remove
          from the  heat and whisk in flour until it 
          forms a thick mixture without lumps. Add
          in Birdseed and mix until fully covered by
          the flour mixture. If you wish, you can 
          substitute ½ cup of bird seed for a ½ cup of 
          dried berries. Place cookie cutters on a cookie
         sheet that has been lined with wax paper. Fill 
         each cookie cutter halfway with the bird seed 
         mixture, packing tightly as you go with the 
         back of a spoon or butter knife. Take a piece
         of yarn or twine, tie the ends and place it in
         the cookie cutter, in the area you think will 
         look good as a hanger. Fill the cookie cutters 
         the rest of the way, again packing the 
         birdseed as you go. Wait for 4 hours before 
         removing the ornaments from the cookie 
         cutters. Wait for a total 24 hours before
         hanging. After Christmas hang the ornaments
         outside to give winter birds a little treat


                     Apple Cinnamon Ornaments

       
                          1 cup ground cinnamon
                          1 cup thick apple sauce
                               1/4 tsp. cloves
                              1/4 tsp. nutmeg


        preheat oven to 200*. Combine the dry 

        ingredients. Using your hands, mix in 
        applesauce until the dough resembles a stiff 
        cookie dough. Working with 1/3 of the 
        dough at a time, roll the dough out to a 
        thickness of about 1/3 inch. Use a 3 to 4 inch
        cookie cutter to cut out your shapes. With a 
        small drinking straw, make a hole to which to 
        hang the ornaments when dried. Gently 
        transfer the ornaments to a nonstick cookie 
        sheet and bake for 3 hours. Once cooled add a
        ribbon or hook and you're ready to go. These
        ornaments not only look pretty on the tree 
        but also make the whole house smell 
        wonderful. 


You can find these two crafts and others in my eBook "Having a Very Merry Christmas on a Budget" available on Kindle and Kindle apps. You can find the link to the book in the advertisement on the right of this blog. ~ Thanks 

Thanks for stopping by, Become a Fan and follow My blog for more fun ideas~ Thank you, Carleen

 Follow Carleen's Crafty Kitchen on Pinterest


Monday, November 11, 2013

Pumpkin....Canned and Puree

Halloween is over with pumpkins sitting on the porch, cheapskate as I am, something needs to be done. For over 12 years I haven't used canned pumpkin, first it was because I was cheap and then over time I noticed that my pumpkin dishes simply tasted better. They say that canned pumpkin is made from premium pumpkins, but for some reason it tastes different from homemade puree. Maybe the can leaves a certain taste? Maybe the pumpkins I use gives it a different taste? Maybe knowing it's fresh pumpkins makes me think it taste better? Well it really doesn't matter what the reason is, I'm not going to stop doing it. So I figured share my technique.  

It all starts by having the right pumpkin. It's best to cook with the pumpkin type "pie pumpkin" or "sweet pumpkin". Yes I know at the pumpkin farms, the pumpkins are not wearing name tags. So you basically look for a pumpkin smaller  then a jack o' lantern size pumpkin. They run somewhere around  4 to 5 pounds. Each will give you roughly 2 pies or about 3 breads. So unless you're planning to do a lot of baking at once, it's best to think about how to save the cooked pumpkin.

One method is cooking down the pumpkin to a puree and freezing it in pre-measured  portions. Another method is home canning it. Pumpkin puree is to thick to be home canned in mason jars, the jars wont seal. So you would jar the pumpkin in cubes with liquid. When you go to open the jar then you go about making into a puree for your recipe. I'll cover both in this post, so hang tight and here we go.

First Step:  this is the first step you take before you decide on which method you are going to use your pumpkin in.
                        
                      Prepare your work station before anything. Have a large pot of boiling water going. On the side have a large bowl filled with ice and water. Cut the pumpkin you are using into quarters, crapping the seeds and stringy innards out. Two at a time place the pumpkin quarters into the boiling water, After about 3 minutes remove the pumpkin and place them directly into the ice water to cool off. When they're cool enough to handle, with a paring knife remove the skin and cut the pumpkin into 1" cubes.


Home canning method  

                             After the first step, wash and sterilize pint size mason jars and lids. Cook the pumpkin cubes until fork tender yet still firm enough to hold it's shape, about 3 to 5 minutes, you don't want them mushy. Fill each jar with the pumpkin cubes leaving an 1 inch head space. To each jar add 1 tbsp. maple syrup , 1/4 tsp of salt and enough hot water to cover yet  leaving you an 1/4 inch head space. Wipe down rims with a lint free rag dipped in vinegar, close with two piece lids. Process in your pressure canner according to the manufacture instructions for 50 minutes. Depending on the size of the pumpkin depends on how many jars you will need, figure either 4 or 5 jars. When you are ready to use the pumpkin as a puree, you drain the liquid from the jar, saving about 1/4 cup from every jar you're using. Place pumpkin cubes and reserved liquid in a sauce pot with a sliver of butter and follow the cooking instructions in the "To Make Puree" method


To Make Puree

                 After the first step add pumpkin, 3/4 cup of water, 2 tbsp. maple syrup and 2 tsp. of butter to a large pot. Bring the water up to a small boil, turn down the heat to very low and cover. Simmer on low for about 45 minutes, stirring occasionally. Allow pumpkin to cool for about 5 minutes. Transfer the pumpkin and what is left of the water to a blender and process on high until the pumpkin resembles what looks like baby food. Transfer back to the pot and on a very low simmer, cook until thickened, stirring frequently, about 10 minutes.  To save you can simply freeze in  measured portions.       


Hopefully you will find all your pumpkin dishes just as tasty with the homemade puree. 

In my eBook "Having a Vary Merry Christmas on a Budget" you can find a great recipe for pumpkin pie. The book is available on Kindle and Kindle apps

Thanks for stopping by, Become a Fan and follow My blog for more fun ideas~ Thank you, Carleen

 Follow Carleen's Crafty Kitchen on Pinterest


Thursday, November 7, 2013

Christmas Countdown Star

During Christmas time it is very easy to forget and overlook the real reason why we celebrate the holiday. We need to bring this into our children lives with the understanding that Jesus is the reason for Christmas. We all need to remember that Christmas is not all about Santa and gifts. I did this craft as a child and brought this into my own home, now it is time to bring into yours.

You're going to need:
             Yellow, green and red     
             construction paper
              Glue or tape

Make an 8 inch star from yellow construction paper. With the green  and red construction make paper chain of  24 links. You attach the chain to the star. Write the following prayer on the star;

                               
                                 "Thank you, dear Jesus,
                       for coming down from heaven to save us.
                              Thank you for Christmas time.
                   Help us to get ready for your coming this year.
                                                Amen"


                                                  OR 


                              " Let us all with gladsome voice
                                     praise the God of heaven,
                                  Who, to bid our hearts rejoice, 
                                      His own son Hath given.
                                                   Amen"


Each Night have you're child take off a link and say the prayer. With the last link it  will be Christmas eve. This is perfect way to get your children to say their prayers while having fun counting down the days to Christmas 


You can find these two crafts and others in my eBook "Having a Very Merry Christmas on a Budget" available on Kindle and Kindle apps. You can find the link to the book in the advertisement on the right of this blog. ~ Thanks

Thanks for stopping by, Become a Fan and follow My blog for more fun ideas~ Thank you, Carleen

 Follow Carleen's Crafty Kitchen on Pinterest


Tabletop Christmas tree

Christmas time is approaching fast, so I started a list on things I needed to decorate with, when I realized I needed a centerpiece. As a cheapskate, I needed to come up with an idea on how to decorate my table for Christmas dinner for very little. Since Evergreens are a big part of Christmas decorating I took this idea and ran with it 

When it comes to real evergreens, it's best to shop in Autumn during planting season for trees. So I went out and bought a 2 qt. potted dwarf Alberta spruce for $8 at my local gardening center (Lowes) in October. I  kept it in it's original pot and decorated it for the centerpiece. What you do is put a small, snug plastic container underneath the potted evergreen, for drainage. Take some fabric, if you don't have fabric you can use wrapping paper, large enough to wrap around the pot to look like a tree skirt. You just go about decorating the tree with small ornaments and ribbon or star on top. If you want to take it a step further, add a string of battery operated lights. During early spring you can plant the evergreen to decorate outside for future holidays. You can even wait till it's full grown to cut down as your main Christmas tree for the living room. If you're willing to spend a few dollars more, you can buy a little larger potted tree and place it on it's own table and use it as your main tree in the living room.

There you go fast and cheap.


 I have this project and other Christmas ideas on a budget in my ebook " Having a Very Merry Christmas on a Budget" available on Kindle and Kindle apps.


Thanks for stopping by, Become a Fan and follow My blog for more fun ideas~ Thank you, Carleen

 Follow Carleen's Crafty Kitchen on Pinterest


Wednesday, September 25, 2013

Spiced Honey

Everyone likes honey one way or another. Some like it straight, some like it in teas, breads, on biscuits, on waffles or pancakes and so on. Some like myself use it more when they're sick. I started making spiced honey years ago and since my family likes to use it when they have a cold with a scratchy throat and cough I continue to make it year after year.

Now I know you're asking why a cheapsake like myself would use honey when it's so expensive, but taking into account how much cold meds. cost, honey is cheaper. Also honey is a more natural, healthy way without any chemicals.

When I go to make this I seal it in mason jars, if home canning is not your thing, storing it in an airtight container will do just fine. This recipe is very easy and is as follows.


5 1/2 cups of honey
8 cinnamon sticks
24 whole cloves
2 lemons, each lemon cut into 6 wedges

You stud each lemon wedge with 2 whole clove, then place everything in a sauce pot and bring to a boil over med-low heat. Boil for 2 minutes occasionally stirring. Take off the heat and let it stand for about 15 minutes. You're going notice a foam on top of the honey, just skim the top of the honey to remove it. If you're planning to home can this in mason jars, at this point you should have 4 pint size jars, sterilized, and a pot of water boiling. Fill each jar with honey, 3 of the lemon wedges and 2 of the cinnamon sticks with a 1/4 inch head space. Wipe each rim with vinegar and place sterilized lids and bands on. Place in water bath for 25 minutes.

If you're not home canning the honey, a simple air tight container will do fine.

You can half this recipe if you want, but I wouldn't cut it down any further then that

Thanks for stopping by, Become a Fan and follow My blog for more fun ideas~ Thank you, Carleen

 Follow Carleen's Crafty Kitchen on Pinterest

Tuesday, August 6, 2013

Homemade Fabric Softener


We're all are trying to cost when it comes to household budgets, which is understandable. One of those things you're trying to cut is your grocery bill. But when you walk into your laundry aisle you'll notice all those high prices for laundry detergent and fabric softeners, then there's the cheap stuff that are basically water more then anything, which you'll wind using double the amount to get the effect you want and in the end cost you more money, which you're trying to avoid.

My favorite budget cutting trick is making things homemade. About  a little over a month ago I wrote a post about Homemade liquid laundry detergent, which works terrifically. Since it worked great, I planned to make up my homemade fabric softener, which I would like to share with you today.

You're going to need:

6 cups of water
3 cups of vinegar 
1 (22oz) bottle of Hair conditioner (cheap one like Suave or VO5)

This is really simple there's no way you can mess this up. Just place all the ingredients in a large bowl, using a wisk to mix it -OR- place all ingredients in a large container and shake.

I told you it was simple...just store in a container. This is not concentrated, you'll need 3/4 cups per load. It equals out to about a penny or less per load 

You can use this mixed in with my Homemade laundry detergent
Thanks for stopping by, Become a Fan and follow My blog for more fun ideas~ Thank you, Carleen

 Follow Carleen's Crafty Kitchen on Pinterest

Monday, August 5, 2013

Homemade Buns in Less then Hour

I don't know about you, but there has been plenty of times when I run out of something I need to make dinner with at the last minute. Since I do my major grocery shopping once a month, and make dough for breads once every two weeks and freeze it, I always run of buns, I always underestimate the amount I need. So I came upon a recipe for homemade buns that takes less then an hour, plenty of time for me to make and grill Hamburgers and ready to serve them both at once. These buns are sweet and airy, I make a few for the side so I can butter them and eat just like that, they're not just for hamburgers.

There's only one rising to this bread which makes it quick. The following is the ingredients you need 

1 tbsp. Yeast
1/2 cup and 1 tbsp. of warm water (115*)
3 tbsp. oil
3 tbsp. sugar
1 egg
2 to 2 1/2 cups of bread flour

Preheat oven to 425*

Dissolve yeast in water, add oil and sugar and let it sit for 5 minutes. In a standing mixer with a dough hook attachment mix the yeast mixture, egg and enough flour to make a soft ball.

These buns will double to 2/3 the size you make it. For hamburgers cut the dough into 8 equal pieces and roll into a ball and place on a well grease baking sheets and press slightly (don't flatten).  You can always make them smaller for dinner rolls. Let it rise for 25 minutes. Bake for 8 to 12 minutes, until golden.

Hope you enjoy them as much as my family does. :) 


Thanks for stopping by, Become a Fan and follow My blog for more fun ideas~ Thank you, Carleen

 Follow Carleen's Crafty Kitchen on Pinterest

Tuesday, July 23, 2013

Basics on Saving Money in the Kitchen

Whether you live on a budget or straight out love to save money, we all look for inexpensive ways to do things. Food shopping and meal planning can be one of those ways to save money, yet eat healthy with good food. There are a few ways to do this, you just need to find ways that suit you and your family. Food shopping on a budget is a subject for a later date, today is an overall on how to save money in the kitchen.

One way to save money in grocery store is by planning your meals ahead of time so there's less trips to the store, unnecessary trips mean being tempted to buy more unnecessary stuff, which only means spending more money. You plan your meals weekly, biweekly or monthly. Double check what your recipes call  for and whats already in your pantry/fridge and make a list accordingly and stick by it.

Another way to save money on food  is making things homemade instead of always buying those canned food/TV dinners. Example, instead of buying biscuits in a can, you make them fresh the day of or make them and then freeze. Dinners you can make ahead and freeze, so you just have to pop them in the oven for those lazy days and not order out . You're probably looking at your freezer at wondering how you could do all that in that small spot. For a great investment of about $150 or more you can get yourself a freezer chest. Now you're probably thinking you wont make enough or have enough things to freeze to make that type of an investment. Think again. There's a lot more things you can freeze then most people realize. If you're thinking that it would be an eye sore, there's ways to dress them up to make them look like a regular piece of furniture...two purposes in one :). I'm in the midst of making somethings to disguise it, which will be a later date. 

There's a little activity out there called Extreme Couponing. I never got into it, maybe I'm a little too lazy to look into the science of it, but it is what the name says EXTREME. Sorry there's is no way I'm going to use 20 bottles of mustard all before their expiration date, let alone finding the space to store all those items. But if you have that space and you will use all those items go right ahead and do the extreme couponing. If your new to Extreme couponing you can learn the basics here

I do ask those who enjoy extreme couponing, to be realistic, realize you might not be able to use all that sits on your shelves. So instead of letting things go bad and then throwing it out, DONATE, there are a lot of hungry families in this country who don't have the capability of buying enough food.

I start squirreling things away for winter during August and September. Starting with fresh produce. Farmers markets are great way to get fresh local produce, it also supports those local growers. The cheaper way is to grow it yourself. Free is even better. Once I saw wild raspberries growing on the side of the road so I jumped out and collected some and made Wild Raspberry Jam  with it. Now I'm not saying to sneak into someone's backyard and take some from their garden,  but there are some produce you can regrow from scraps, you can find info on it on websites like this one.

There's a lot of people out there, like myself, who do home canning. It's a great way to preserve fresh produce from your garden or farmers markets. Any soups, as long as there's no diary involved, you can preserve. If you're new to Home Canning and thinking of learning, you can read my post regarding Home Canning. My Wild Raspberry Jam has instructions how to preserve it. You can get more instructions and some recipes on Home Canning from Ball website.  But as time goes on I will post more recipes with canning instructions.

I'll go into greater detail of each of these ideas as time goes on.  I will post more recipes, so stick around.


Thanks for stopping by, Become a Fan and follow My blog for more fun ideas~ Thank you, Carleen

 Follow Carleen's Crafty Kitchen on Pinterest


Monday, July 15, 2013

Wild Raspberry Jam


It's mid July and it feels like the sun is trying to toast me alive. But I really don't mind since my favorite berry, raspberries, are in season. Me being a cheapskate, I loved it, in my glory,  when I found wild raspberries growing on the side of the road. So with a plastic tub in my hand I got to picking, enough for Jam and some for me to munch on while I'm making the jam.

The jam is pretty simple and goes as follows:

2 cups of wild raspberries
1 tbsp. Lemon juice
2~1/2 cups of sugar
1 tbsp of Classic Fruit Pectin Powder

Sterilize EVERYTHING, jars, lids..everything that will come in contact with the jarring process 

Just toss the raspberries with lemon juice and also toss sugar with the pectin. Place both mixtures in a saucepan and heat on med-high. Continuously stir till a full blown boil is going at which point,stirring constantly, continue the boil for 5 minutes. Skim any foam that forms on top of the jam. Lower the heat to really low and do a jell test, by taking a small amount of the jam onto a saucer and place in the freezer for a moment or two. When you take the saucer out of the freezer, dip your finger into the jam. If  the jam on the plate is too thin, add a 1/2 cup of sugar to the mix and boil for another 3 minutes and test again. If the jam on the plate is just right, continue to jarring it up. 


Majority of jams and jellies foam up when cooking, my tip of the day is put 1/4 tsp of butter or margarine before it starts boiling, it won't effect the taste and the foam is nowhere to be found.

makes two (2) half pints or  one (1) pint

In a waterbath canner, boil half pints for 20 minutes and/or pints for 25 minutes at full boil.

Thanks for stopping by, Become a Fan and follow My blog for more fun ideas~ Thank you, Carleen

 Follow Carleen's Crafty Kitchen on Pinterest


Saturday, July 6, 2013

Homemade Strawberry Ice Cream


Being it's the beginning of July and the heat is going up with it, my family has the taste for ice cream. Well then again my hubby has that craving all year long for ice cream, but more so during the summer. I don't even remember where I got this recipe, but I have it and no one is going to let me forget it.


The ingredients are simple

16oz  Whipped Cream
16 oz Frozen Strawberries, partially thawed
1 egg white
1/2 cup sugar

In a metal bowl to a standing mixer you put the partially thawed frozen strawberries, egg white and sugar.  Beat on med-low speed with the wire whisk attachment for 20 minutes, or until fluffy.

Place the whipped cream in a large bowl and FOLD the strawberry mixture in, DO NOT stir, if you stir you will deflate the whipped cream and deflate the egg/strawberry mixture, you don't want this since it gives the ice cream  the smoothness.


Once fully combined you place the ice cream mixture in plastic containers and freeze for 4 hours before serving.

If you want extra strawberries in yours, double everything except the whipping cream 

Thanks for stopping by, Become a Fan and follow My blog for more fun ideas~ Thank you, Carleen

 Follow Carleen's Crafty Kitchen on Pinterest

Tuesday, July 2, 2013

Homemade Play dough

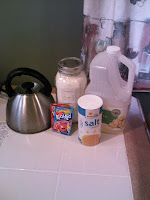
Last thing I need is kids complaining on Rainy days that they're bored. So today we made homemade Play dough. There's a few recipes out there floating around, and I tried 2 basic recipes. I find the recipe I made with kool-aid the easiest. This activity, no matter which recipe you use, needs adult participation as well children, there's heating in the microwave involved and we don't want kiddies to hurt themselves with the temperature.

Now this makes a lot, perfect for a few children not to fight over all the different colors. Today we made two different colors one that was red and the other which was on the pinkish side. For each color you'll need:

1 and 1/4 cups of Flour
1/4 cup of salt
1 package of kool-aid drink mix ~ color of your choice
1 cup of boiling water, slightly cooled
1 and 1/2 Tablespoons of oil

In a large bowl combine all your dry ingredients and mix well, at this moment you wont see the color of the kool~aid. 


Add the oil and water and stir with a wooden spoon.

Your play dough will look like a big hot mass of gooey mess, that's fine, just mix till well combined and you don't see any lumps of flour.


This is when the adults come in. Place the bowl in the microwave for 30 seconds. When you take it out of the microwave don't waste a second and throw your hands in and knead for 2 minutes to incorporate everything, you have to make sure nothing hardens because of the heat. My hands can handle hot, but if your hands are sensitive use a spoon, but it's best to your hands.


If the play dough is still sticky after 2 minutes of kneading, throw it back in the microwave for 30 seconds. take out and start kneading again right away and continue until it's warm enough for the kids to handle and let them take over on kneading till cooled.


There you go you have play dough that smells terrific...hopefully that can entertain them for awhile


Thanks for stopping by, Become a Fan and follow My blog for more fun ideas~ Thank you, Carleen

 Follow Carleen's Crafty Kitchen on Pinterest


Sunday, June 30, 2013

Crock-Pot Tomato Sauce


Time to whip out my beloved crock-pot, I love them so much I have 2. Yes I know it's the last week of June and you're probably wondering why I'm crazy enough to use a crock-pot with all the heat and humidity. Well crock-pot cooking is not just for winter, in fact it's a perfect solution to cooking dinner on a hot summer day. The crock-pot doesn't put off much heat, you just have to throw everything in it and run off to the beach or pool instead of worrying about standing over a hot stove. It makes the summer enjoyable. 

Yes I also know I'm not Italian, far from it, but I do love my Italian food. So my recipe is a combination of 2 recipes that came from two Italians I knew...I just love it ♥ 

2~28oz cans of Tomato sauce 
2~28oz cans of Tomato puree
2~12oz cans of Tomato paste
1~28oz can of water  
1 and 1/4 cups of table wine of your choice (or substitute with 3/4 cup of sugar)
1 cup of grated Parmesan Cheese
4 Garlic cloves, diced 
1/2 cup of Fresh chopped parsley, chopped finely
1/4 cup of Fresh chopped oregano, chopped finely
5 large fresh basil leaves, chopped finely
1 med. size onion, diced finely
Olive oil

Saute diced onion and 2 chopped basil leaves in olive oil until onion is tender and translucent. Add onions and remaining ingredients in the crock-pot. I prefer to use table wine in the recipe, even tho the alcohol wears off with the cooking, it cuts the  acidity taste of the tomatoes and gives it a deeper savory taste,  compare to sugar which gives it a sweet taste which why I dislike about jarred sauce. But the choice is yours. Cook on low for 4 hours, every hour or two remove the cover and stir the sauce away from the sides.  If you have crock-pot has a warm setting, place it on warm for additional 4 hours. If your crock-pot doesn't, just continue cooking on low for another 2 hours.

This makes a lot so you can freeze what you have leftover or home can it in Mason jars.


Whether you're looking for a replacement crock-pot or you're looking for your first one I suggest  Hamilton Beach Slow Cooker, you'll find an Amazon link to the right. I personally love Amazon because you can find a range of prices the item. 


If you plan home canning it and are new to it read my post about it here 

Sterilize all jars and lids

For every pint size mason jars you use add 1/2 tsp. of lemon juice along with the sauce, for quart size jar you add 1 tsp. of lemon juice along with the sauce. Don't worry you will never taste the lemon juice, it's just there to bring up the acidity level enough to do the waterbath method for sealing the Jars.


Thanks for stopping by, Become a Fan and follow My blog for more fun ideas~ Thank you, Carleen

 Follow Carleen's Crafty Kitchen on Pinterest


Thursday, June 27, 2013

Homemade Pizza

About 7 months ago I got myself in jam, a jam my family hasn't let me out of since. At the time it was Halloween, 3 months after moving into a new place. I promised my family Pizza before we ran out the front door to go Trick-or-Treating, only to find out there was no pizza place willing to deliver to us in the boondocks. Not willing to run out for it I came up with making my own. Took me about an hour and half, at the time I thought it was too long for me to deal with but since my family loved it, it was time worth doing.

For the Crust you will need:

1 tbsp. of  yeast
1-1/2 cups of water- 105* to 110*
2 tbsp. olive oil
1 tbsp. sugar
3-1/2 to 4 cups of Flour*

Your favorite toppings


* now it depends on what type of crust you want depends on the type of flour you use. For a crunchy crust you use bread flour. For a chewy crust you use all purpose flour. With my experimenting I noticed when I make thin crust I use all purpose because bread flour makes it way too crunchy. With Thick crust I use Bread flour so it gives it a soft crunch unlike all purpose flour makes it chewy.


In a standing mixer  combine yeast and water and let it stand for about 5 minutes, until the yeast is foamy. Put the dough hook on the standing mixer and add remaining ingredients and enough flour to make a soft dough. You place the dough in a well greased bowl and let it rise for about 45 minutes until doubled in size.

Meanwhile preheat oven to 400*

Depends on if you want a large deep dish pizza it makes 1, if you make thin crust pizza's like me I get one 10" round pizza and one 9x13 Sicilian pie (square pizza). 

Grease the pan you're using ,  I make my 10" on a baking stone and my Sicilian pie (square) I use a regular 9x13 cookie sheet.

Time to punch down the dough and shape. Some people use a rolling pin to shape the dough, I just use my hands to shape it. Make a small lip around the edges to prevent your toppings from sliding off. You then prick the dough lightly with a fork in the middle (to prevent the dough from bubbling up), Place the dough in the oven for 5 minutes. 

When you take the dough out you're going to see it all puffy, don't freak, when you place your toppings on and continue cooking it it will settle down.

Now with my pies I top it with homemade tomato sauce and mozzarella cheese,  half of one pie I put sausage. Sometimes I get creative and put everything but the kitchen sink on a pie just for myself. But put what you like

Bake for an additional 15 to 20 minutes depending on the thickness of your crust. Once you see the edges are a lightly golden color, you know it's done.

once you take it out let it sit for a few moments to settle...then enjoy :) 


Thanks for stopping by, Become a Fan and follow My blog for more fun ideas~ Thank you, Carleen

 Follow Carleen's Crafty Kitchen on Pinterest


Wednesday, June 26, 2013

DIY Compost Bin

I was looking at my garden today thinking how nice it would be if I had a compost bin. I would love for my tomato and pumpkin plants to benefit from the nutrients other then store bought fertilizer. The thing is the ones you find at the hardware stores are expensive but ugly as well. Well me wanting one and being a cheapskate  to boot, I found out a cheaper way to get what I want by grabbing my beloved 5 gallon bucket and made it myself.


All you need is~

       1~ 5 Gallon Bucket
        Marking Pen (I used a paint marker)
       Drill with a 3/16 drill bit

    AND THAT's IT  :)


With a marking pen space out 12 holes on the lid, 20 holes spaced out all over the sides of the bucket and 10 holes on the bottom


Now grab you're drill and drill away

There you go :)  Now all you have to do is fill

If my husband trusts me not to hurt myself (I'm clumsy at times especially when it comes to sharp things that's battery operated) to hand over his drill to me then you know this is simple

I keep mine at the back of my property so if it starts to stink I wont smell it. But try to place where it can get some sun so it can heat it to help with decomposition.

I also twice a week flip it back and forth a little and then flip it to have it sit on the opposite end, just to stir it up the dead stuff and mix the newer stuff in

If you find bugs and worms creeping around in it...Don't freak...it's good, they help with the decomposing

The following lists is what you can and can not put in your compost bin


DO's

Fruit and peelings
Veggies and peelings
egg shells
 nut shells
Coffee grounds and filters
tea bags (remove the staple)
cardboard egg cartons
shredded paper
plain brown cardboard~including paper towel and toilet paper rolls
Shredded Newspaper
grass clippings/plant clippings
leaves
Hay
wood chips
Bark
saw dust
pine needles 
old soil
Fire pit/fireplace ashes (as long as there was no fire starter used)
 Horse and Cow manure

DON"T

pet waste/litter
Meat
Dairy
oils/fats/grease/lard
Any type of processed foods 
anything treated with pesticides
Coal/charcoal


Thanks for stopping by, Become a Fan and follow My blog for more fun ideas~ Thank you, Carleen

 Follow Carleen's Crafty Kitchen on Pinterest


Sunday, June 23, 2013

Homemade Liquid Laundry Detergent

Alright this is where me being cheapskate chimes in. I always love to save money and always will. I tried the homemade dry laundry detergent that you can find everywhere on pinterest. It worked but it only lasted me 2 months even thou the recipe swears it would last up to a year. Then I came across the Duggers (19kids and counting) Homemade Liquid Laundry Detergent. So I thought if works and lasts for a family of 21 then why not try it myself. So I took their original recipe and put my own little twist to it. I made a little booboo making it, but it was a good mistake. Dugger's recipe is concentrated, my mistake made mine ultra-concentrated (if that's even a phrase).

Mine is as follows:
        5 gallon bucket
        2 Fels-Naptha laundry soup bars
        2 cups Super Washing Soda
        1 cup Borax
        1-1/2 cups Liquid Fabric Softener


Fels-Naptha,  Borax and washing soda you can find in the laundry aisle close to one another. DO NOT substitute Baking Soda for the washing soda, it's not the same chemical makeup. Using a peeler make thin slivers of the 2 bars of soap. And place in a stainless steal pot with 8 cups of hot tap water and heat on med low heat till soap is fully dissolved, stirring constantly. Meanwhile throw washing soda and borax in the bucket. Once the soap is dissolved place it in the bucket and stir so that the dry mix can dissolve. Next, keeping the bucket on the floor and using the spray nozzle from your kitchen faucet fill your bucket with HOT tap water, stopping every once in awhile to give a good mix. If you don't have one of the kitchen faucet sprayers, you can do it with the shower head, you just want a sprayer to help you mix it up.Fill to about 3 inches from the top.

 Now it's time for you to cover it and let it sit and work it's magic for 6 hours.

 After 6 hours when you take off the cover you will notice a big mass of soft gooey soap floating in small amount of liquid. Now this is when you're going to get a little soaped up yourself. So roll up your sleeves because you are going to put hands in and break up the big mass of gooey soap. No matter which recipe you use, mine or the Duggers, it's still going to be lumpy, you just need to break up the big lump. Learn from my mistake and wear short sleeves and take your rings off. I had to go fishing for my wedding ring at one point. At this time is when I added in the fabric softener. Then stick your hands in and mix well. After that you let it sit for another 6 hours


Remember patience is a virtue 

Now it's been a total of 12 hours and you're almost there!!!!!

 Now take a clean used container, like a gallon milk jug or cleaned out detergent bottle, and fill halfway with Hot tap water and fill the rest with your homemade detergent. Shake well and let it cool....and there you did it 

In a top loading machine, use 5/8 cup per load, a total of 180 loads. 

In a front loading machine, use 1/4 cup per load, a total of 640 loads!

this should last you for about 3 to 4 months 


***I forgot to mention, You need to shake the laundry bottle you use to store your diluted mixture, even diluted it still gets lumpy****


Thanks for stopping by, Become a Fan and follow My blog for more fun ideas~ Thank you, Carleen

 Follow Carleen's Crafty Kitchen on Pinterest


*** UPDATE***  You can find my recipe for my homemade Fabric softener here

****UPDATED #2****   I just made my second batch and I didn't have liquid fabric softener on hand, so I made it without and I personally think it smells WONDERFUL from the  Fels-Naptha so this time around I'm going to leave the fabric softener out. and stick with the cheap non scented dryer fabric softener sheets so I can enjoy that wonderful smell. Thought I should share :)

Saturday, June 22, 2013

welcome

Welcome, My name is Carleen and I would like to invite you to step into my Crafty kitchen.

 Let me share some fun facts about myself, I'm mother of two and wife to a wonderful husband. I have a love of cooking, home canning, knitting, quilting, basic crafts and pinching every penny my little fingers can grab, which I'm happy to share with you in this blog.  To me, family comes first and will love to show my ideas and thoughts on how to do so. I feel like life is to short to be worrying over the little things,  and because of that I like to make things simple and have fun while doing it.


My love of cooking runs deep but like most people I don't have all the time in the world to do it. So in a lot of my recipes you will notice center around  my beloved crockpot, I have two of them and I love them so much. For the meals that I don't use the crock-pot for are very easy to follow. I'm also a pro at home-canning so you will notice a lot of my recipes I double and then go about canning them, which I'm going to take you step by step on how to do. To expand on the home-canning I will be sharing homemade jellies and jams and homemade gifts you can give (which everyone loves to receive). Hopefully you can enjoy the meals and I'm always open to suggestions or your take on the recipes that I share.

Baking is another passion of mine. My mother was never a baker so this just picked up when I was younger and expanded as time went on. My speciality is bread but I love to do pies, cookies and much more as well. So grab your spatula and get ready for it :)

Crafts is another favorite of mine. I picked up quilting a few years back, but I do more sewing crafts then quilts. In this blog I'm going to be showing you both :) I love knitting but I have to admit I cheat at it, I use the kniffty knitter. If you're not familiar with the kniffty kitter, just hang around and you'll see.  I also do everyday type of crafts. I will show off my talents (at least I feel like they're talents) in this blog.

So hang around and become a follower of my blog and you'll be amazed at the creativity I can bring out of you :)

Thanks for stopping by ~ Carleen


Follow Carleen's Crafty Kitchen on Pinterest